Docker containers
Table of content:
background
The basis of the Linux cluster is formed by two hosts that employ a number of docker containers to realise the desired functionality. These two hosts are called liszt and beethoven.
There are also two domains that we use to easy external access. These are informeer.de and bladzij.de Generally we use informeer.de for services hosted on liszt and bladzij.de for services hosted on beethoven (although not exclusively).
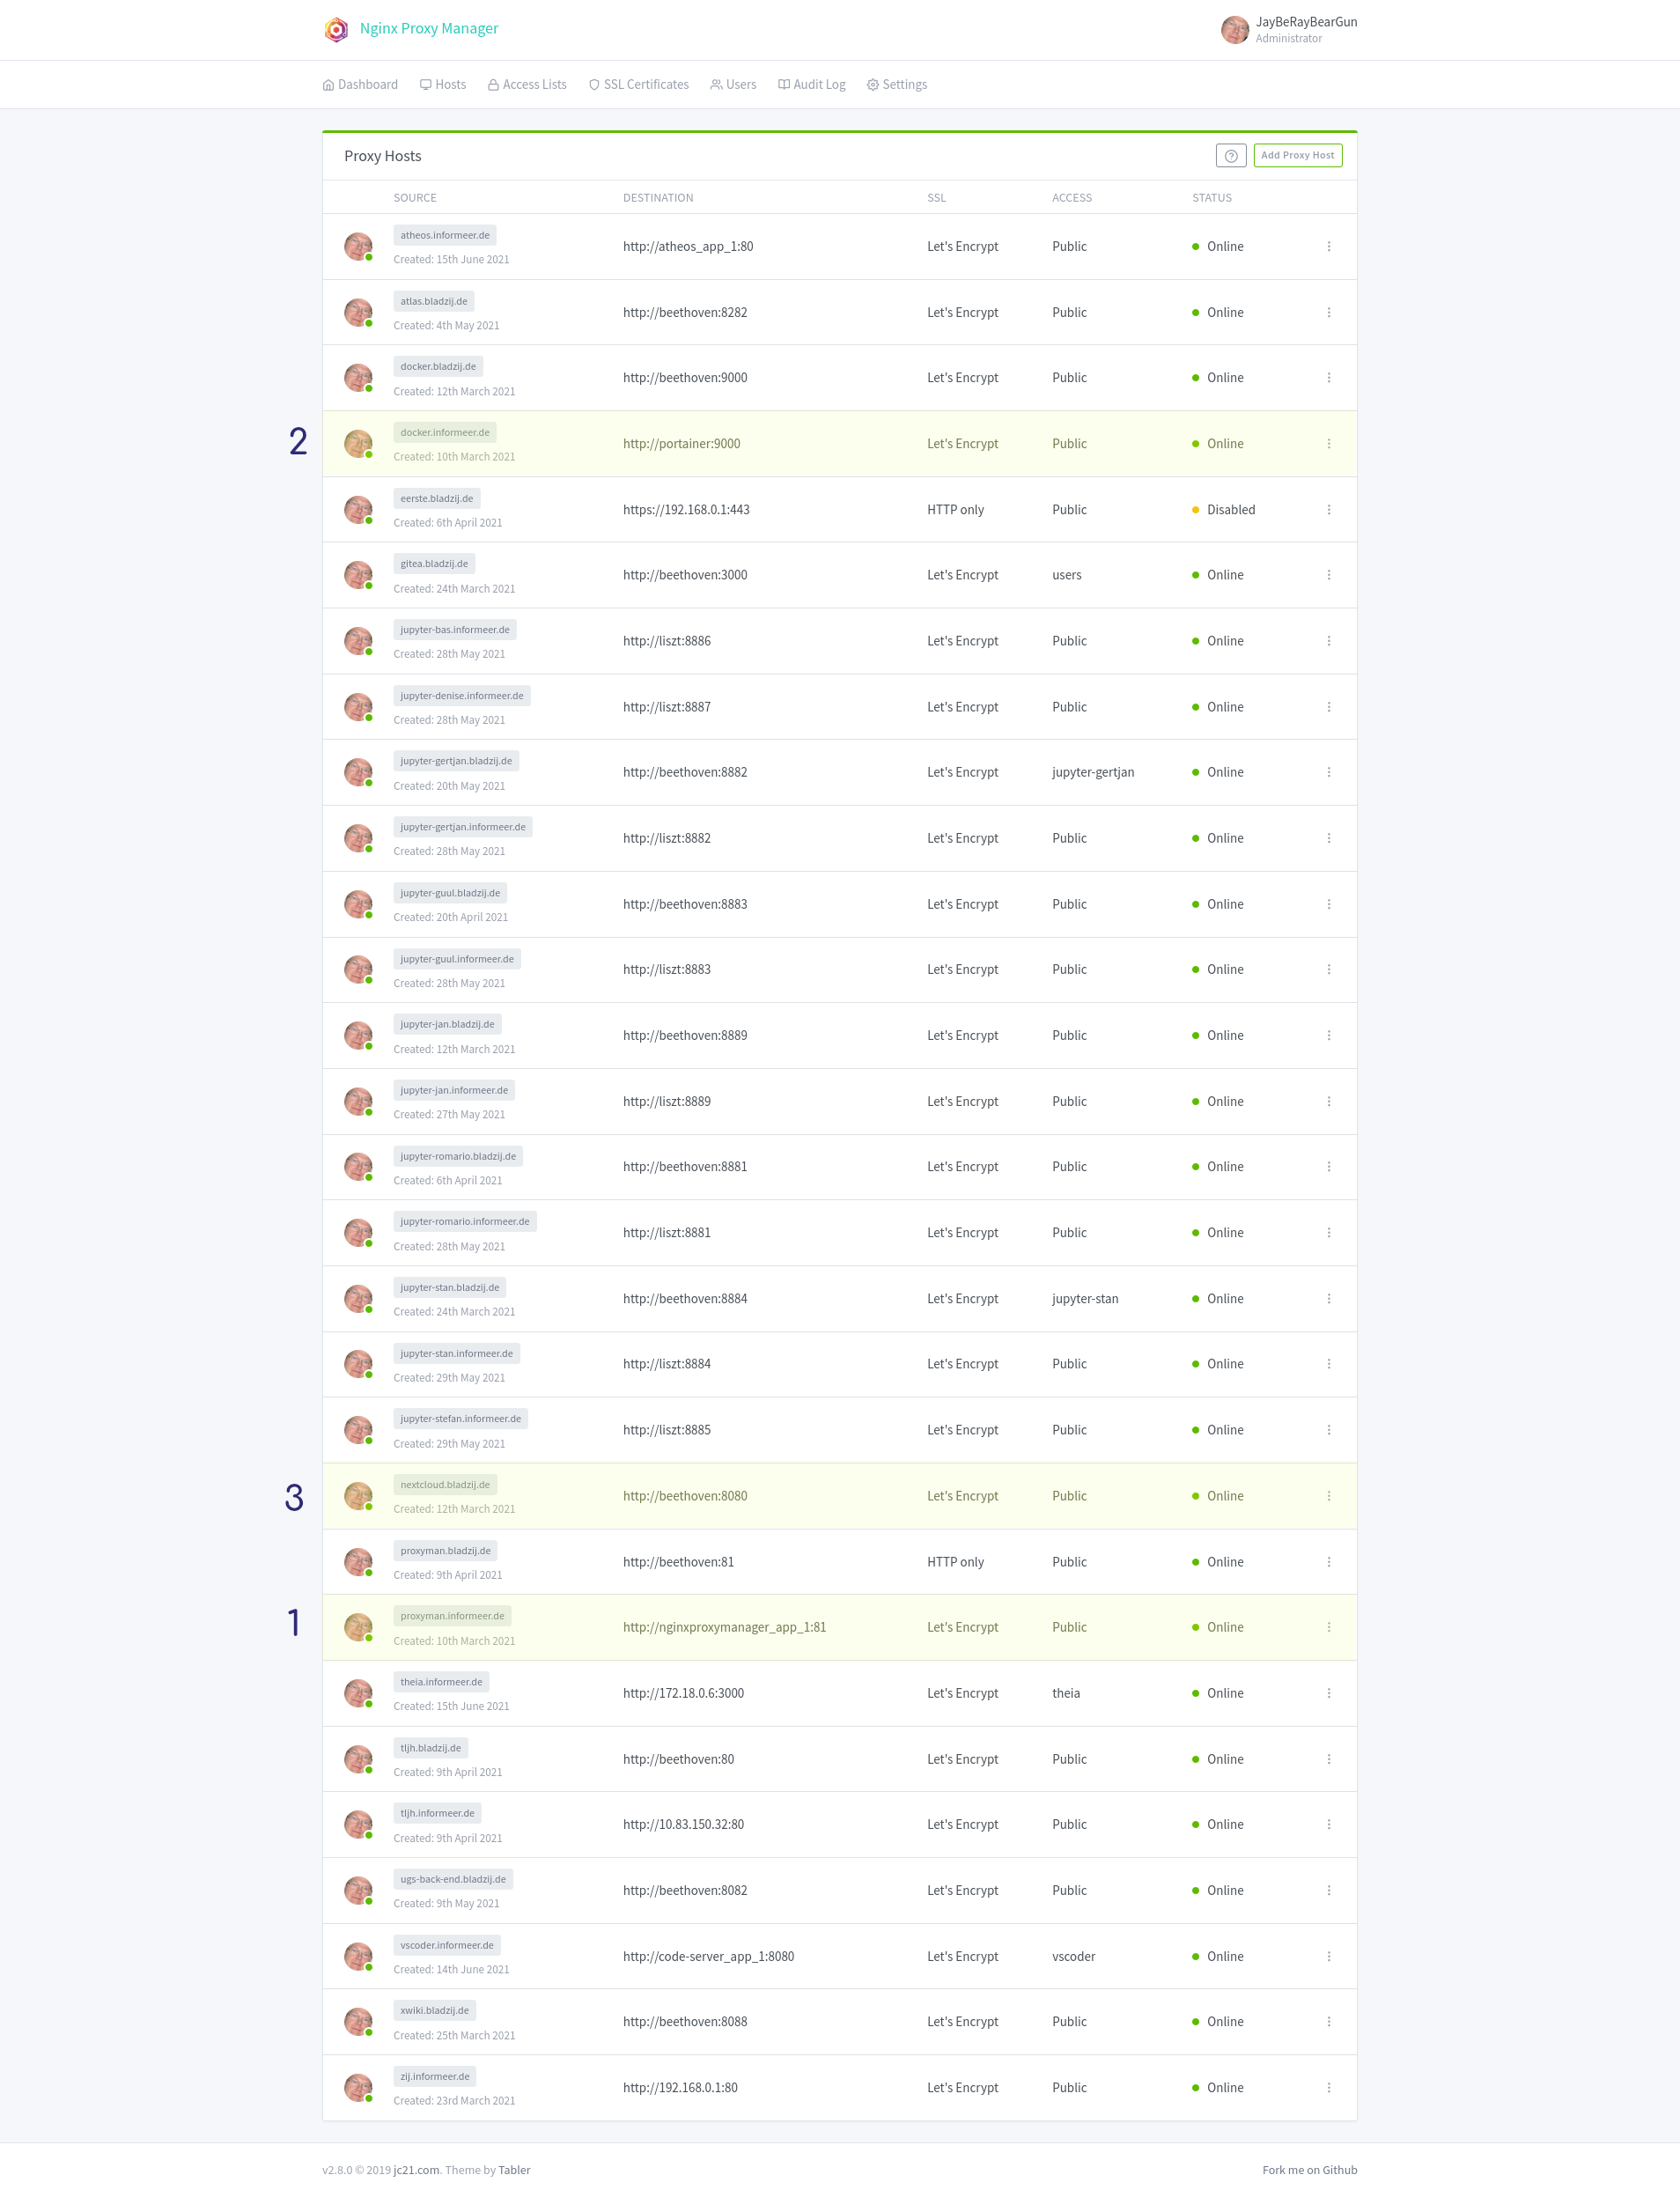
Currently the setup is realised in such a way that liszt manages overall (web) access by means of the https://proxyman.informeer.de This service is supplied by the nginxproxymanager docker container.
In this section we will discuss which containers are present and how they are created and maintained. A simplified overview can be found here. Please note that contrary to the diagram/sketc the port numbers 80 and 443 had to be maintained because only those ports can be used to request SSL certificated from "Letsencrypt". This means the ssh tunnel does not use ports 4443 and 8080 but the original port 443 and 80.
Both beethoven and liszt have at least these two docker images running:
- nginxproxymanager https://nginxproxymanager.com/
- portainer https://www.portainer.io/
portainer is a nice browser/webbased gui that make docker container management (and deployment) easy. Currently we mostly do the container installation by hand and use the webgui as a dashboard for starting/stopping and tweaking.
nginxproxymanager
This container is present on both liszt and beethoven. However the one os liszt is the important/critical one. The one on beethoven is there for historical reasons. This is because beethoven was temporarily not allowed to be connected to the internet and its tasks had to be taken over bij liszt. Ideally the setup should be such that we can remove liszt from the network withour consequence. Currently that is definitely not the case (so don't do it). If absolutely needed it can be arranged but for now it is considered too much work to be worthwhile.
installation
Below the docker-compose.yaml file that is used to create the nginxproxymanager container.
version: "3"
services:
  app:
    image: 'jc21/nginx-proxy-manager:latest'
    restart: always
    ports:
      # Public HTTP Port:
      - '80:80'
      # Public HTTPS Port:
      - '443:443'
      # Admin Web Port:
      - '81:81'
    environment:
      # These are the settings to access your db
      DB_MYSQL_HOST: "db"
      DB_MYSQL_PORT: 3306
      DB_MYSQL_USER: "npm-user"
      DB_MYSQL_PASSWORD: "41s0s3cr1t!"
      DB_MYSQL_NAME: "npm"
      # If you would rather use Sqlite uncomment this
      # and remove all DB_MYSQL_* lines above
      # DB_SQLITE_FILE: "/data/database.sqlite"
      # Uncomment this if IPv6 is not enabled on your host
      # DISABLE_IPV6: 'true'
    volumes:
      - ./data:/data
      - ./letsencrypt:/etc/letsencrypt
    depends_on:
      - db
  db:
    image: 'jc21/mariadb-aria:latest'
    restart: always
    environment:
      MYSQL_ROOT_PASSWORD: 's3cr1t'
      MYSQL_DATABASE: 'npm'
      MYSQL_USER: 'npm-user'
      MYSQL_PASSWORD: '41s0s3cr1t!'
    volumes:
      - ./data/mysql:/var/lib/mysql
The content above needs to be stored in the docker-compose.yaml file in the /opt/nginxproxymanager directory. The commands below illustrate how to get it up and running.
mkdir /opt/nginxproxymanager
cd /opt/nginxproxymanager
cp ~/docker-compose.yaml .
docker-compose up -d
Generally this is the approach when creating other containers as well. All of the reside in the /opt/ filesystem and whenever possible we use docker-compose command instead of docker run. It is very important to have all subsequent containers be part of the same nginxproxymanager network. This will be stressed again below.
configuration
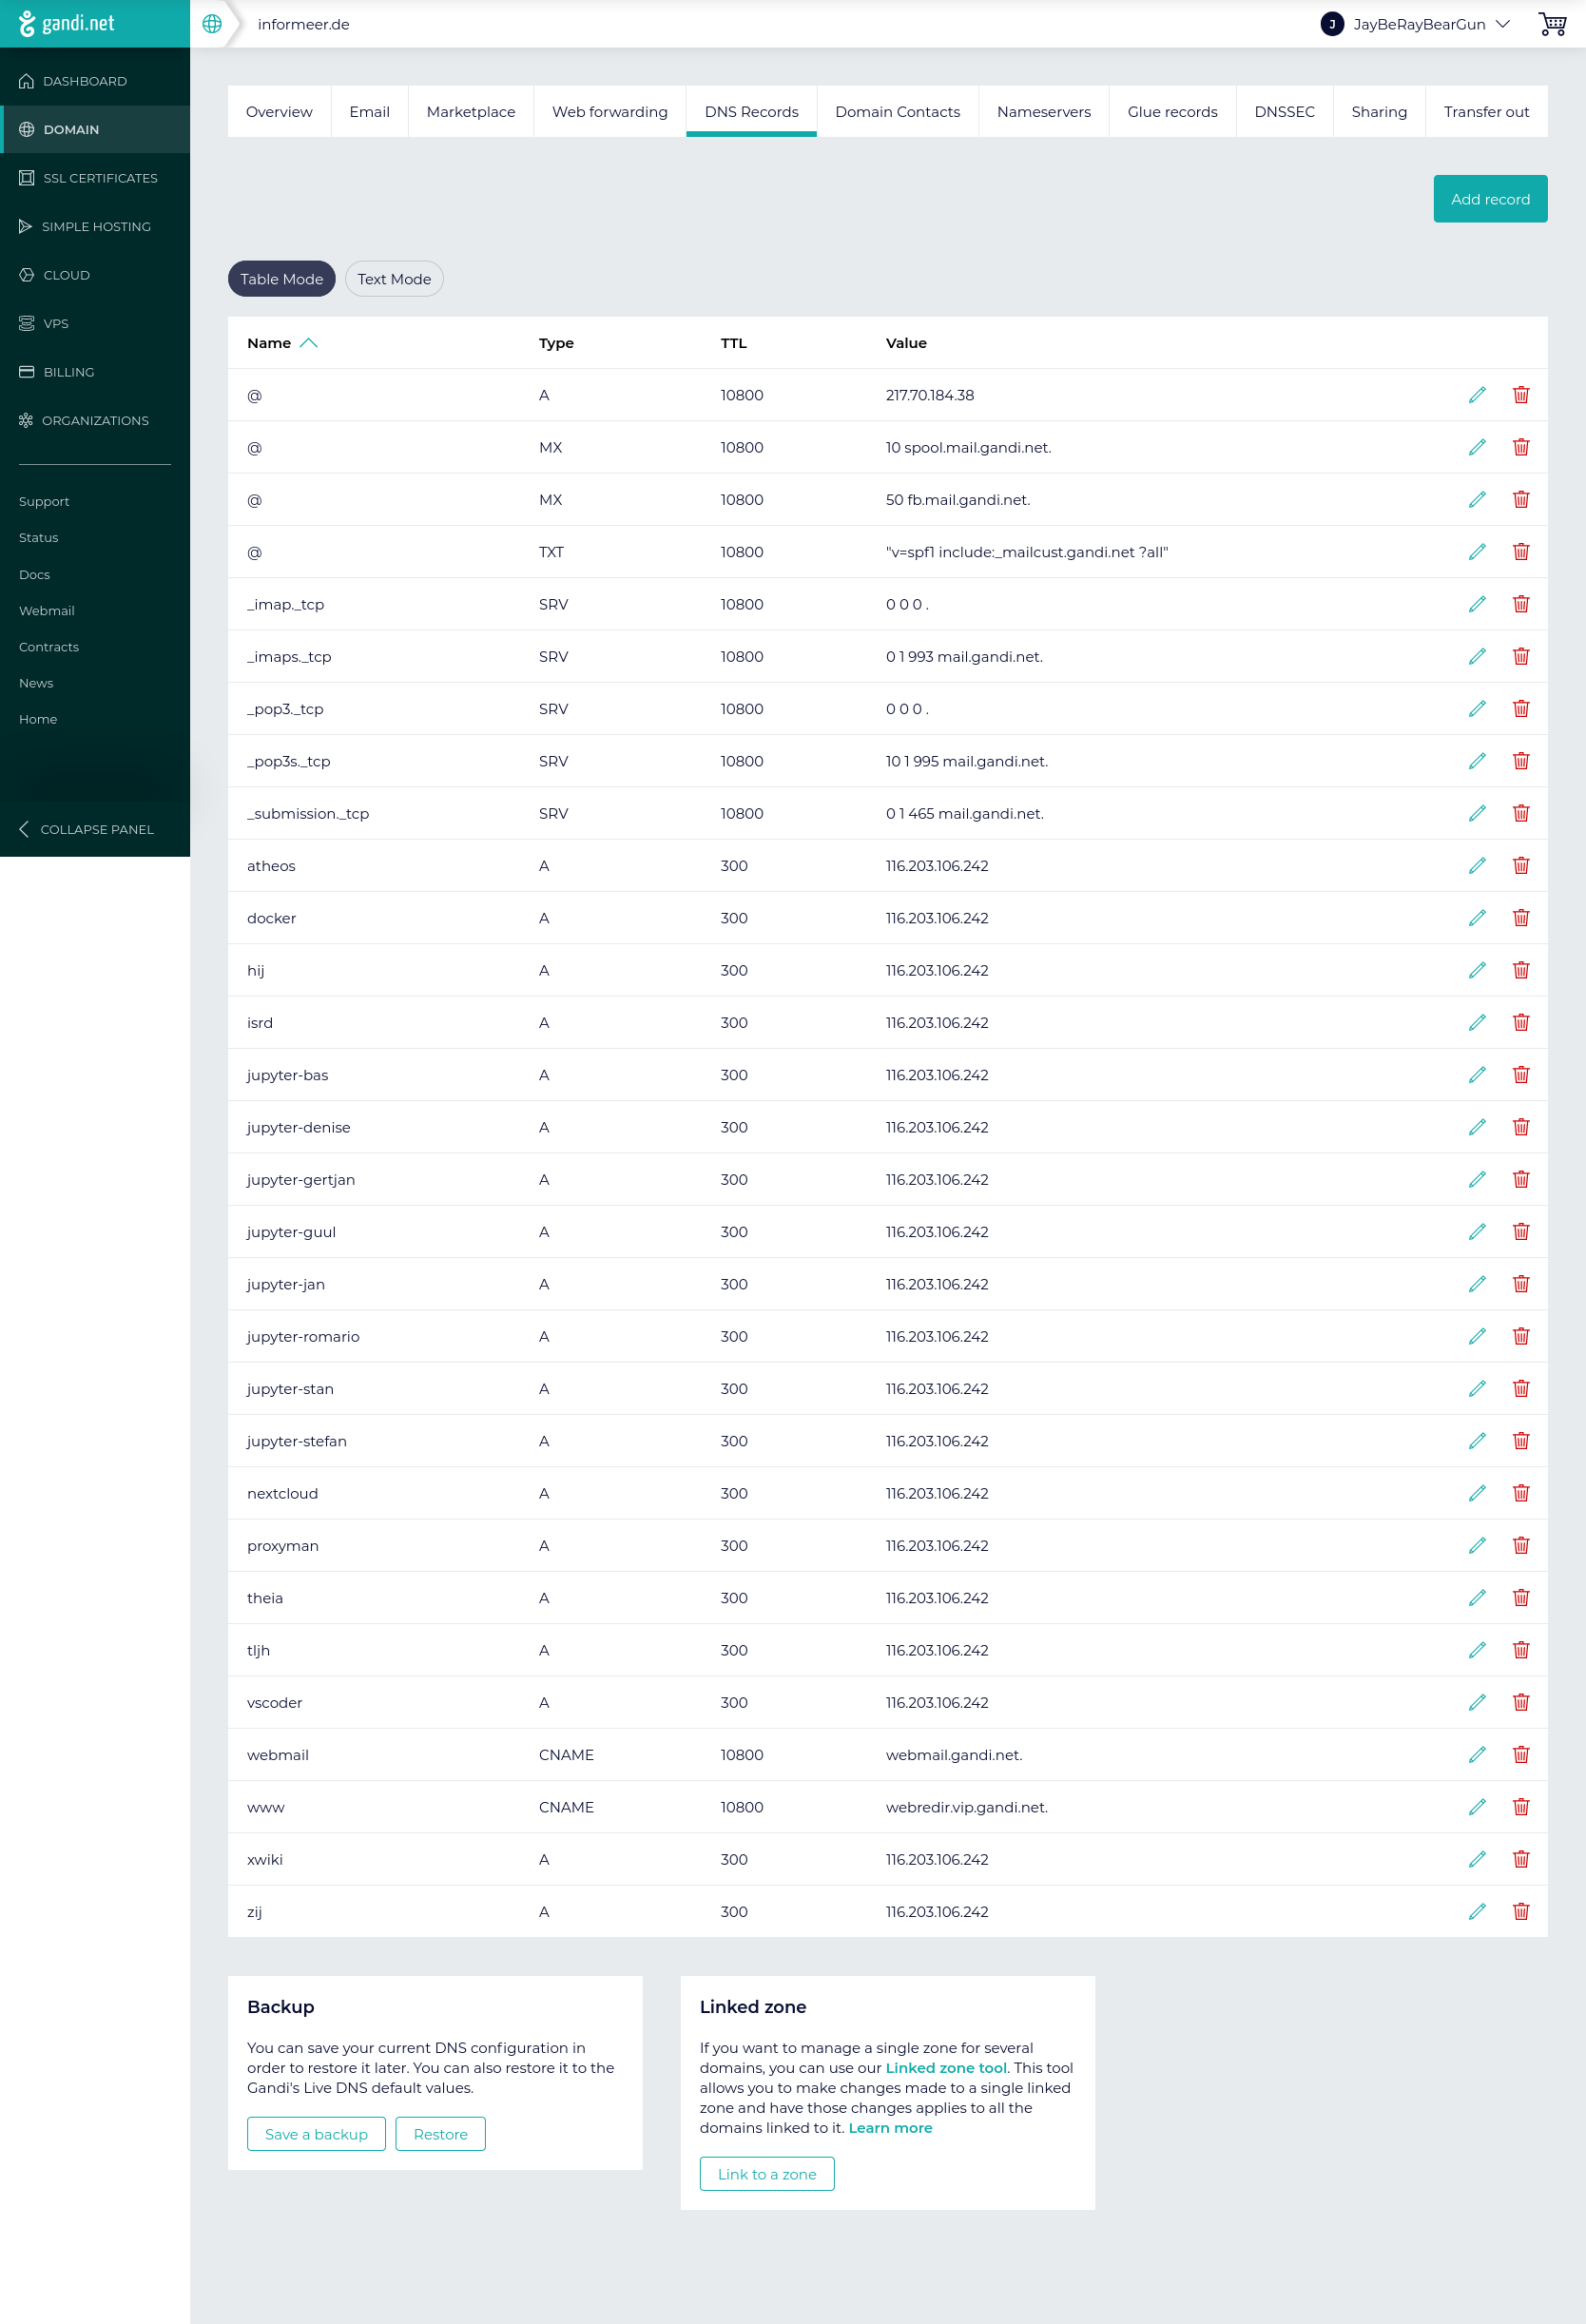
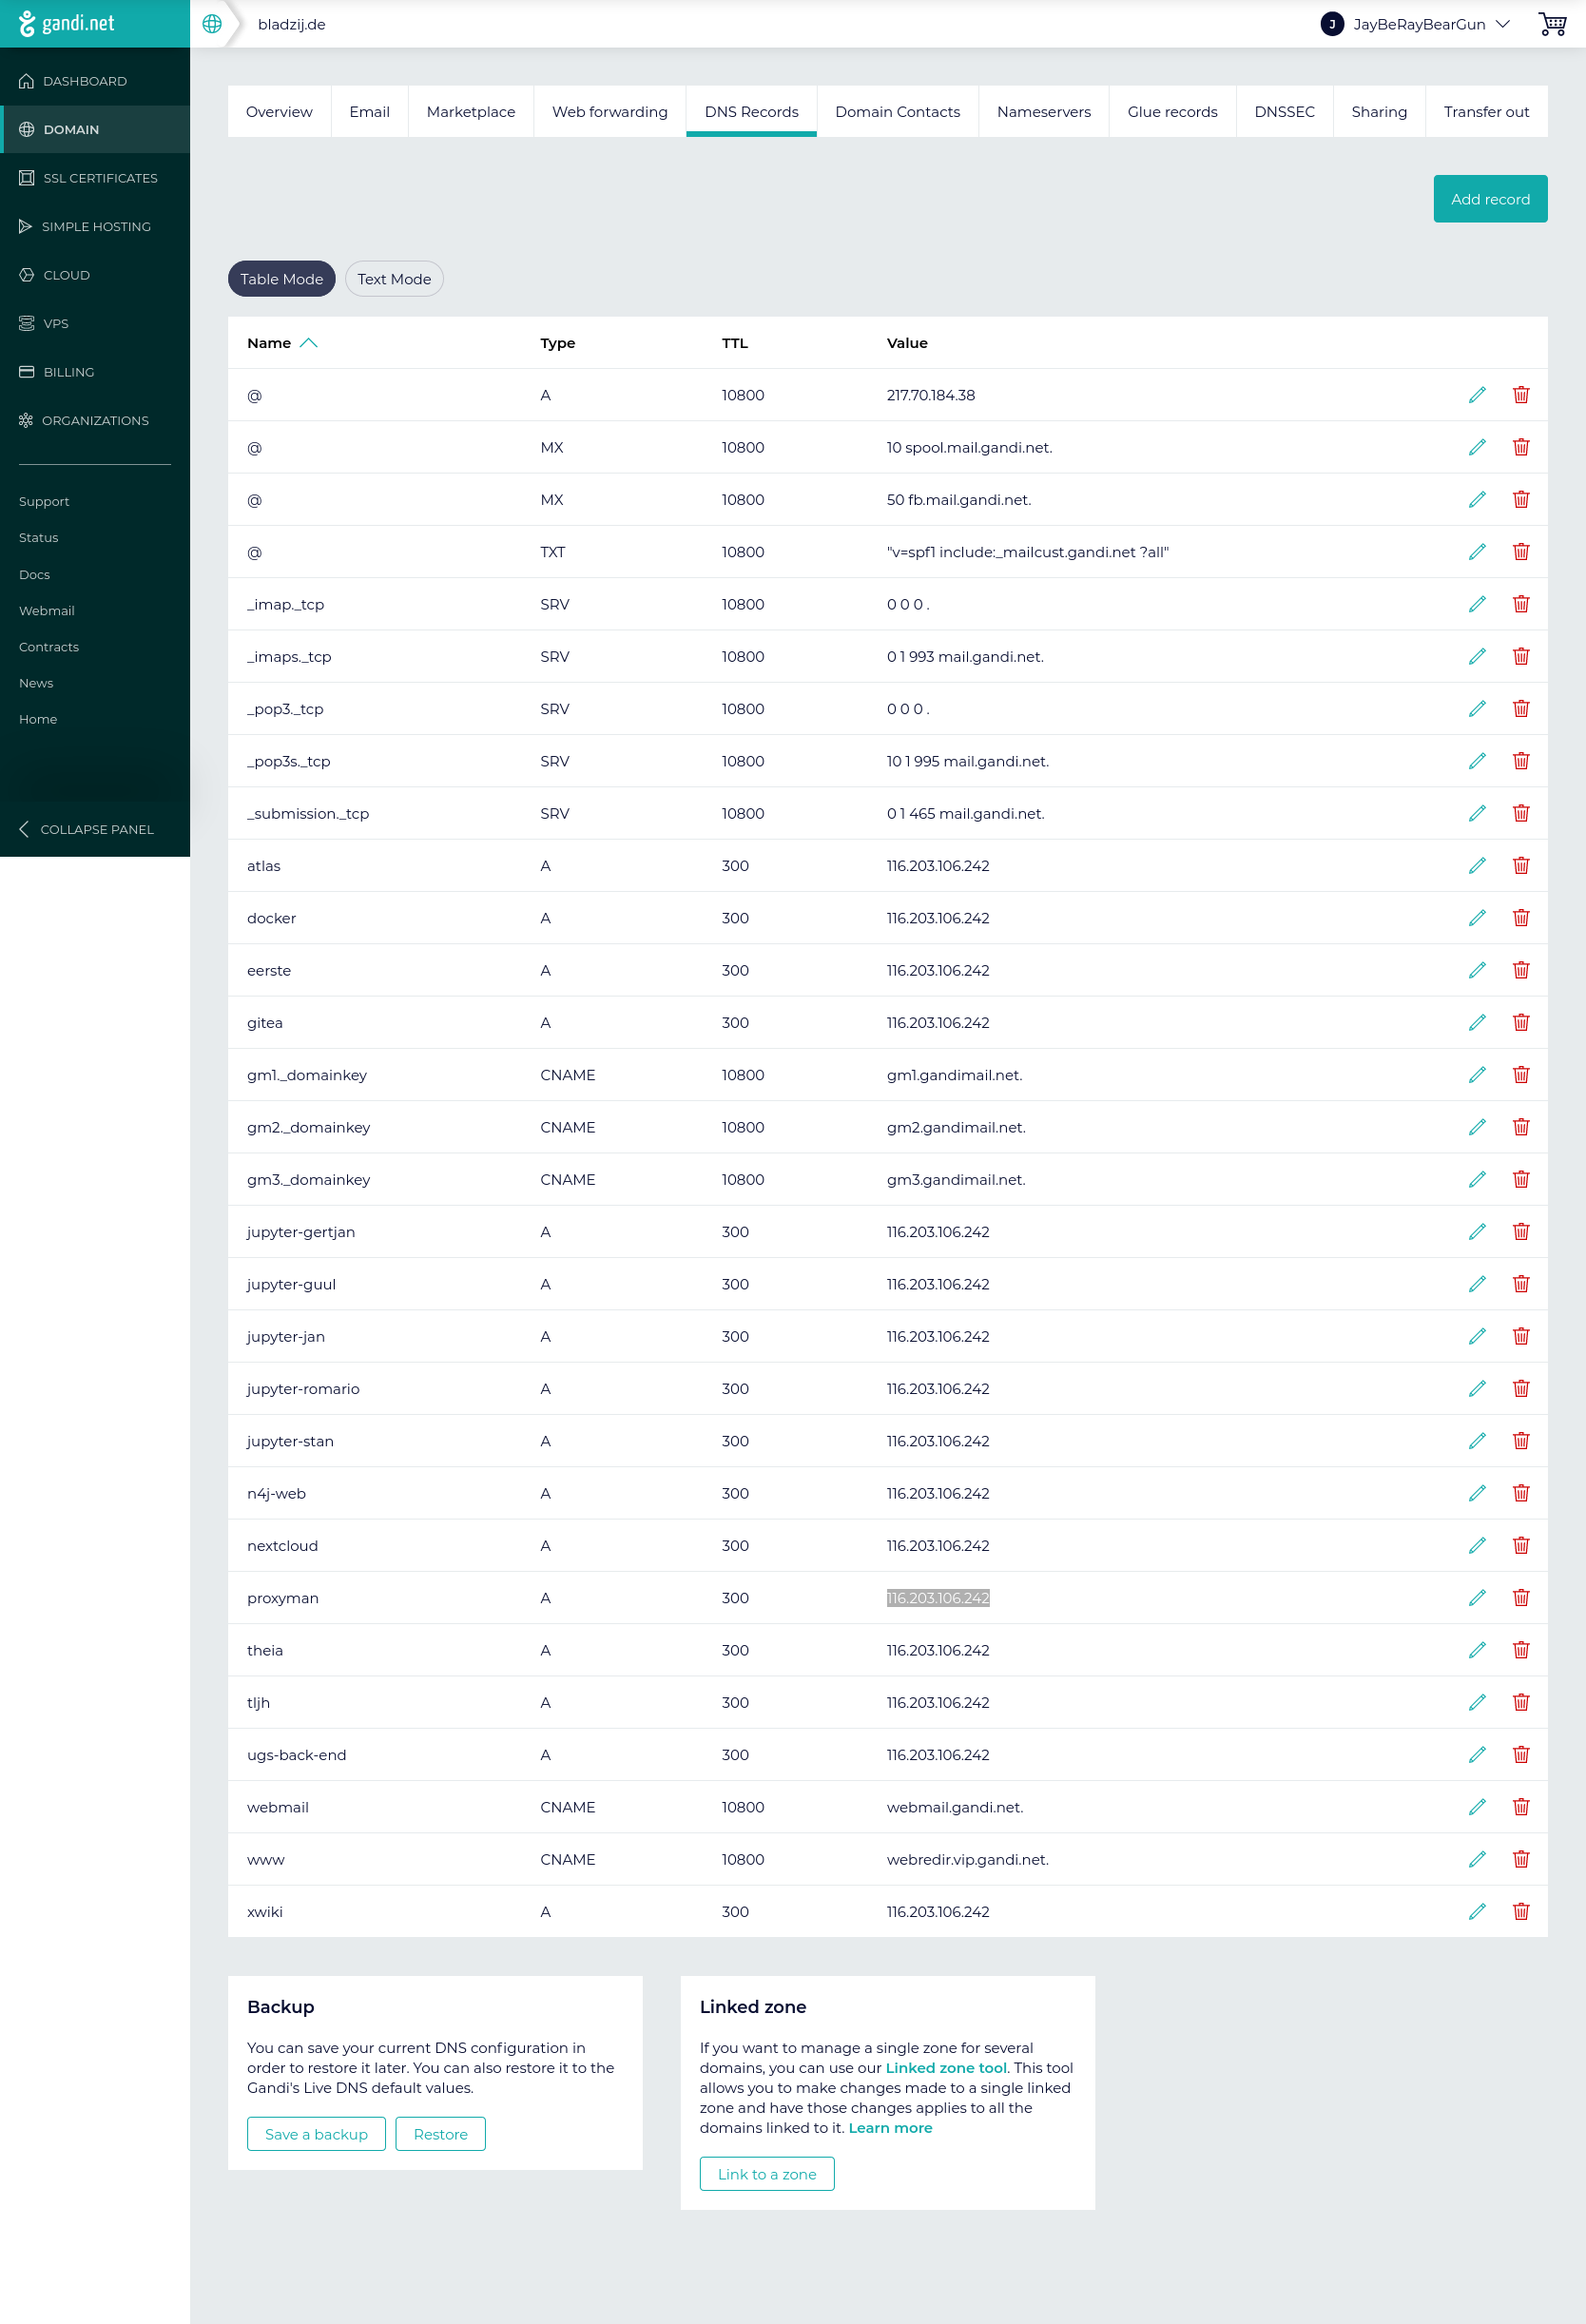
DNS zone file settings
The hosts needs to be resolvable hence there should be a DNS where we can add them to the zone files. This is done at https://gandi.net
Specific host settings
Nextcloud
The proxymanager by default limits the size of the files that can be transferred. This is a good thing but for nextcloud you might want to bypass this setting. This can be done by opening the opening the edit and select the advanced tab. Then enter the stanza below:
 proxy_set_header Host $host;
 proxy_set_header X-Forwarded-Proto $scheme;
 proxy_set_header X-Real-IP $remote_addr;
 proxy_set_header X-Forwarded-For $proxy_add_x_forwarded_for;
 proxy_max_temp_file_size 16384m;
 client_max_body_size 0;
references:
- https://www.reddit.com/r/unRAID/comments/ezw5jo/nginx_proxy_manager_and_nextcloud_large_file/
- https://forum.seafile.com/t/nginx-proxy-manager-causing-failure-when-uploading-files/11492/6
portainer
This is a convenient docker web-interface to docker. Together with the nginx-proxymanager these two are considered the two fundamental docker images to have available. As with other docker images it is important to put them on the same (internal) network. The following line executed as root from the /opt (or oether) directory will create the desired docker container and start it daemonised.
docker run -d --network nginxproxymanager_default --restart=always --name portainer -v /var/run/docker.sock:/var/run/docker.sock -v portainer_data:/data portainer/portainer-ce
The (usual) port mapping to 8000 is removed as we don't use edge agents anyway.
nextcloud
Contrary to the portainer instance which we created using the regular docker command line we now use docker-compose. This offers more fine grain configuration possibilities. After some testing the configuration settled upon is docker-compose.yaml located in /opt/nextcloud and listed below. # JBR are comment lines. NB note the space character after the hash character.
# JBR version: '2'
version: '3'

volumes:
  nextcloud:
  db:

networks:
  default:
    external:
      name: nginxproxymanager_default

services:
  db:
    image: mariadb
    restart: always
    command: --transaction-isolation=READ-COMMITTED --binlog-format=ROW
    volumes:
      - db:/var/lib/mysql
    environment:
      - MYSQL_ROOT_PASSWORD=Pf0kL6O
      - MYSQL_PASSWORD="KlukKluk789MaMaLoe456!"
      - MYSQL_DATABASE=nextcloud
      - MYSQL_USER=nextcloud

  app:
    image: nextcloud
    restart: always
# JBRv may not be needed in some cases e.g. proxymanagers and specific local setups
    ports:
      - 8080:80
# JBR^
    links:
      - db
    volumes:
      - nextcloud:/var/www/html
# JBRv this bind mount volume enables sharing from host with nextcloud instance. NB: permissions are governed by host!
      - /data/shared_nextcloud:/on_host/data
      - /home/4all/shared/nextcloud:/on_host/home_4all
# JBR^
    environment:
      - MYSQL_PASSWORD="KlukKluk789MaMaLoe456!"
      - MYSQL_DATABASE=nextcloud
      - MYSQL_USER=nextcloud
      - MYSQL_HOST=db
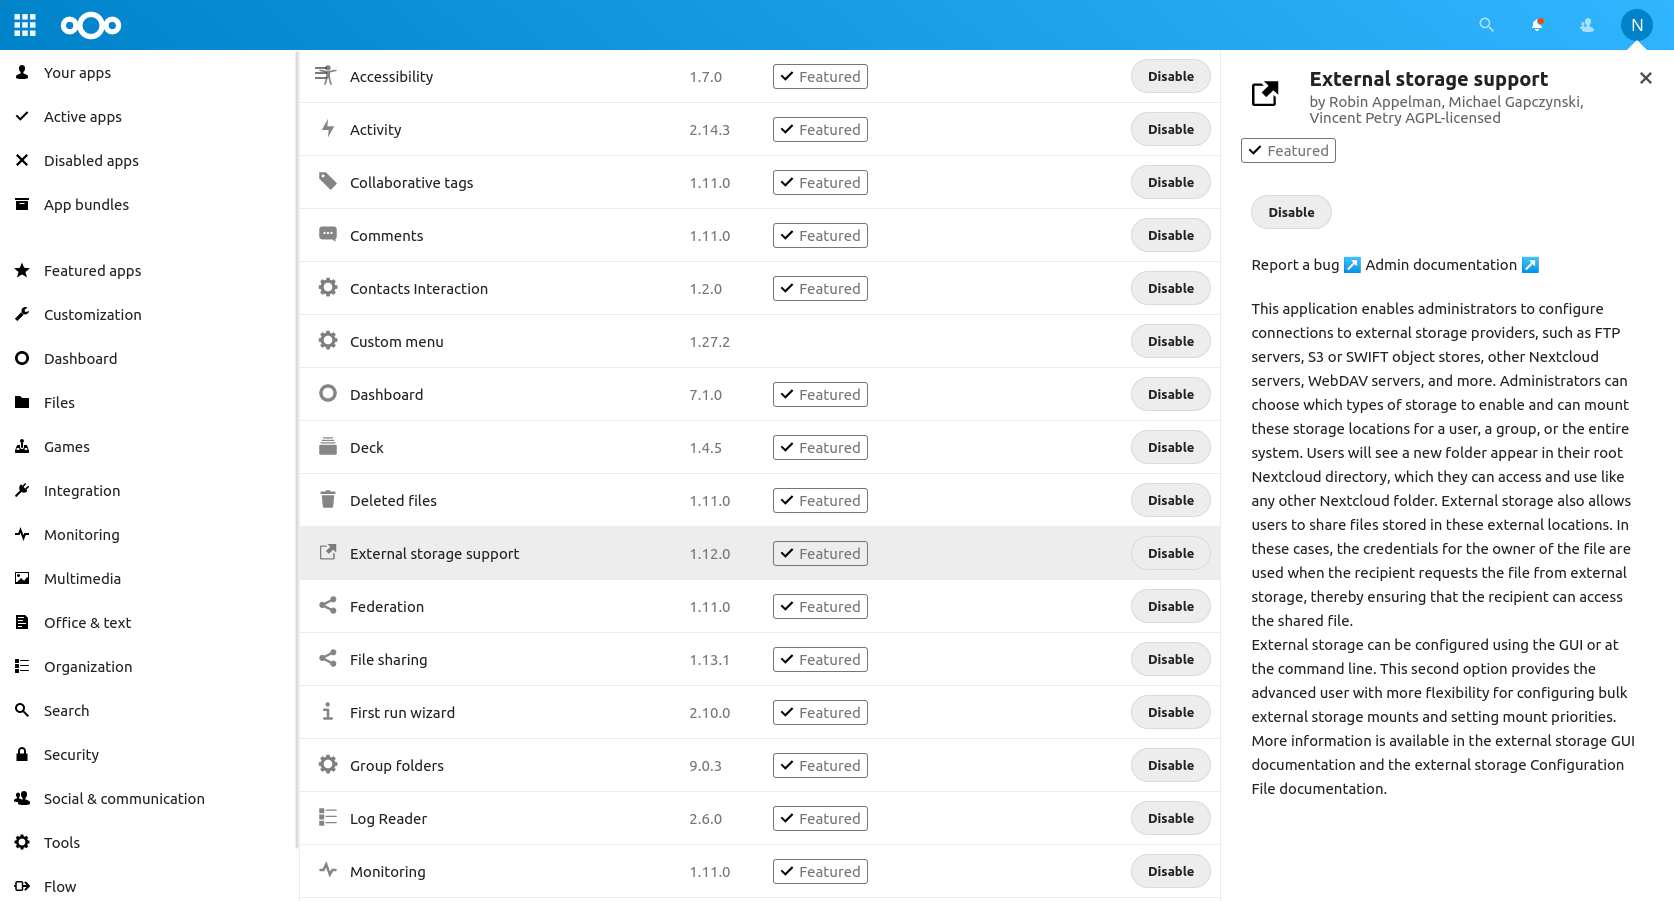
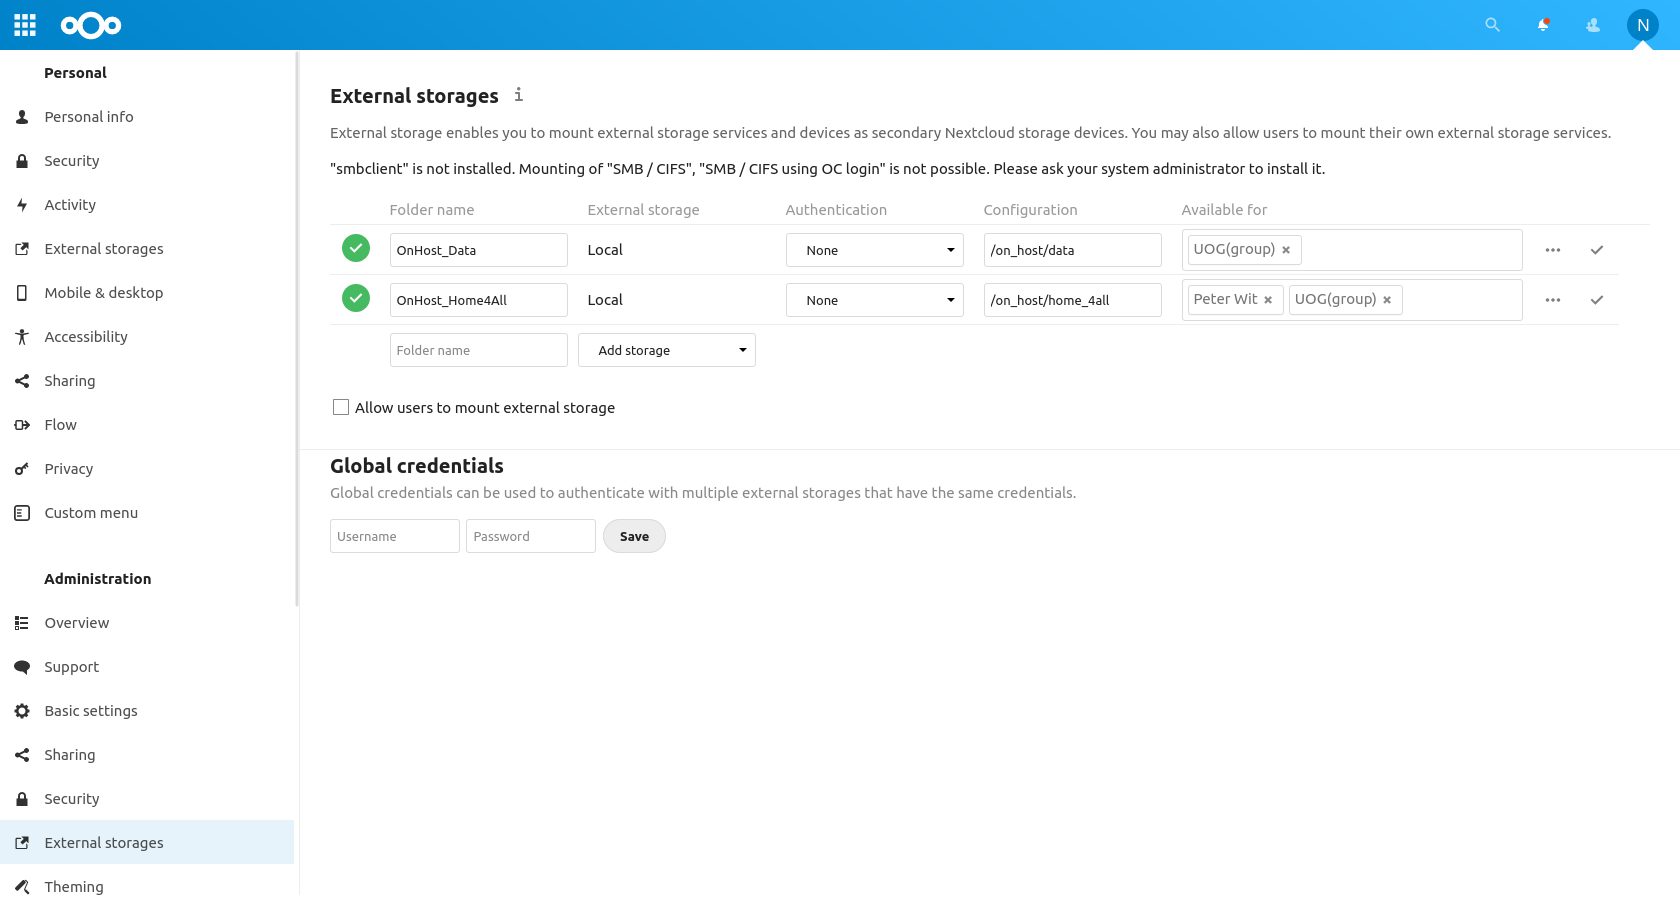
Please note the two mounted volumes that the host makes available to the nextcloud container. These are used by the nextcloud plugin that make external storage available to instance (external means not within the container).
/data/shared_nextcloud:/on_host/data
/home/4all/shared/nextcloud:/on_host/home_4all