
Git & Gitea
Basic setup and use of git and gitea
We use git together with jupyter-lab and gitea as separate webinterface for source code version control of jupyter notebooks. Here we describe the basic setup in use.
git basic setup
Start by specifying common (fixed) variables like your name and email address. Normally this is a one-time setup.
git config --global user.name "Jan Rhebergen"
git config --global user.email "jan@rhebergen.net"
Unix. MacOS and DOS (Windows) handle line endings differently according to the table below:
| Operating system | Character used for line ending |
|---|---|
| Unix | LF (line feed) = '\n' |
| MacOS | CR (carriage return) = '\r' |
| DOS/Windows | CR LF (carriage return & line feed) = `\r\n` |
To ensure correct handling in a mixed environment we set the following:
git config --global core.autocrlf input
git config --global core.safecrlf warn
And just in case you're using Windows:
git config --global core.autocrlf true
git config --global core.safecrlf warn
git initialisation and setup
This step basically consists of creating a directory and initialising it as a git repository. In case there already is a repository available elsewhere one can copy (clone) it here.
mkdir ~/Data-Science/OGR-II/
cd Data-Science/OGR-II
git init
The git repository consists of the 'working directory' (holding the files) the 'index' or staging area and the 'head' pointing to the most recent commit made. These three trees are maintained for you by git. In our example we will copy the files (jupyter notebooks) from our nextcloud instance using rclone. We assume rclone has already been configured and has a known remote called beethoven.
Normally one would clone the files from a git repository. In this case however it does not exist yet. The jupyter notebooks are stored in the nextcloud instance. using the joint UOG group directory.
cd ~/Data-Science
rclone copy beethoven:UOG/OGR-II/Notebooks/ ./OGR-II/
Once the files are located in the working directory they can be added to to the git repository by first adding them to the index (staging) and subsequently committing them to the head of the repository as illustrated below.
git add *
git commit -m "my initial/first commit, yeah!"
Perhaps this is a good occasion to install a git tool like lazygit. Strictly speaking this is not needed but it can come in handy when interacting with git repositories. lazygit is a powerful text based tool which runs straight from the commandline. It can be install using conda. In case conda cannot be found (for whatever reason) also execute the first line below.
optional!
source $HOME/miniconda3/etc/profile.d/conda.sh
conda activate data-science
conda install lazygit
interact with remote git repository (gitea instance)
Next we want to create a remote repository on beethoven where we have a gitea instance running. It is assumed that beethoven appears in the /etc/hosts file (see below). Otherwise the local/private IP should be used.
127.0.0.1 localhost
::1  localhost
127.0.1.1 pop-os.localdomain pop-os
192.168.166.130 liszt
192.168.166.222 beethoven
192.168.166.103 wagner
This specifies the git/gitea repository on beethoven as our remote repository:
git remote add origin http://beethoven:3000/UOG/OGR-II.git
NB: the UOG organisation and data-science team have been created beforehand using the gitea webinterface.
For a private repository this would be:
git remote add origin http://beethoven:3000/jan_rhebergen/my-first-private-repo.git
If you happen to make a mistake, just delete the remote entry like so:
git remote remove origin
For the above to work you gitea needs to be have the variables below configured in /var/lib/docker/volumes/gitea_gitea/_data/gitea/conf/app.ini (don't forget to restart gitea). If this is not the case the push (and create) will fail. The alternative is to use the web interface to create an empty repository and then push the local one to the gitea server. We also want to disable the self registration possibility for security reasons.
[repository]
ENABLE_PUSH_CREATE_USER = true
ENABLE_PUSH_CREATE_ORG = true

[service]
DISABLE_REGISTRATION = true
Finally the OGR-II repository need to be pushed to gitea
git push -u origin master
using git with jupyter-lab
The while idea of using git is to make sharing and maintaining code (e.g. jupyter notebooks) easy and well organised. Jupyter-lab as an excellent git plugin which takes care of a lot of the usual hassles. The sections above are assume a (bash) login shell on liszt. This section assumes a running jupyter-lab instance with the jupyterlab-git extention installed by using: conda install jupyterlab-git. This will make available a handy and powerful git interface.
git has several authentication mechanisms. Currently it is up to the user to make sure that jupter-lab can authenticate to the git server. There currently is no dialogue in the jupter-lab interface that facilitates this. Hence to make authentication as painless as possible we need to modify the local git config file $HOME/Data-Science/OGR-II/.git/config according to the snippet below bye adding the [credential] section:
FROM:
[core]
        repositoryformatversion = 0
        filemode = true
        bare = false
        logallrefupdates = true
[remote "origin"]
        url = http:~/~/beethoven:3000/UOG/OGR-II.git
        fetch = +refs/heads/*:refs/remotes/origin/*
[branch "master"]
        remote = origin
        merge = refs/heads/master
TO:
[core]
        repositoryformatversion = 0
        filemode = true
        bare = false
        logallrefupdates = true
[remote "origin"]
        url = http:~/~/beethoven:3000/UOG/OGR-II.git
        fetch = +refs/heads/*:refs/remotes/origin/*
[credential]
        helper = store
[branch "master"]
        remote = origin
        merge = refs/heads/master
USING:
git config credential.helper store
This will cause credentials that are supplied to be stored in the local git setup. To get this working one only needs to authenticate once from the bash command line (e.g. git pull). Then subsequent requests for authetications that originate from jupyter-lab will use these stored credentials automatically.
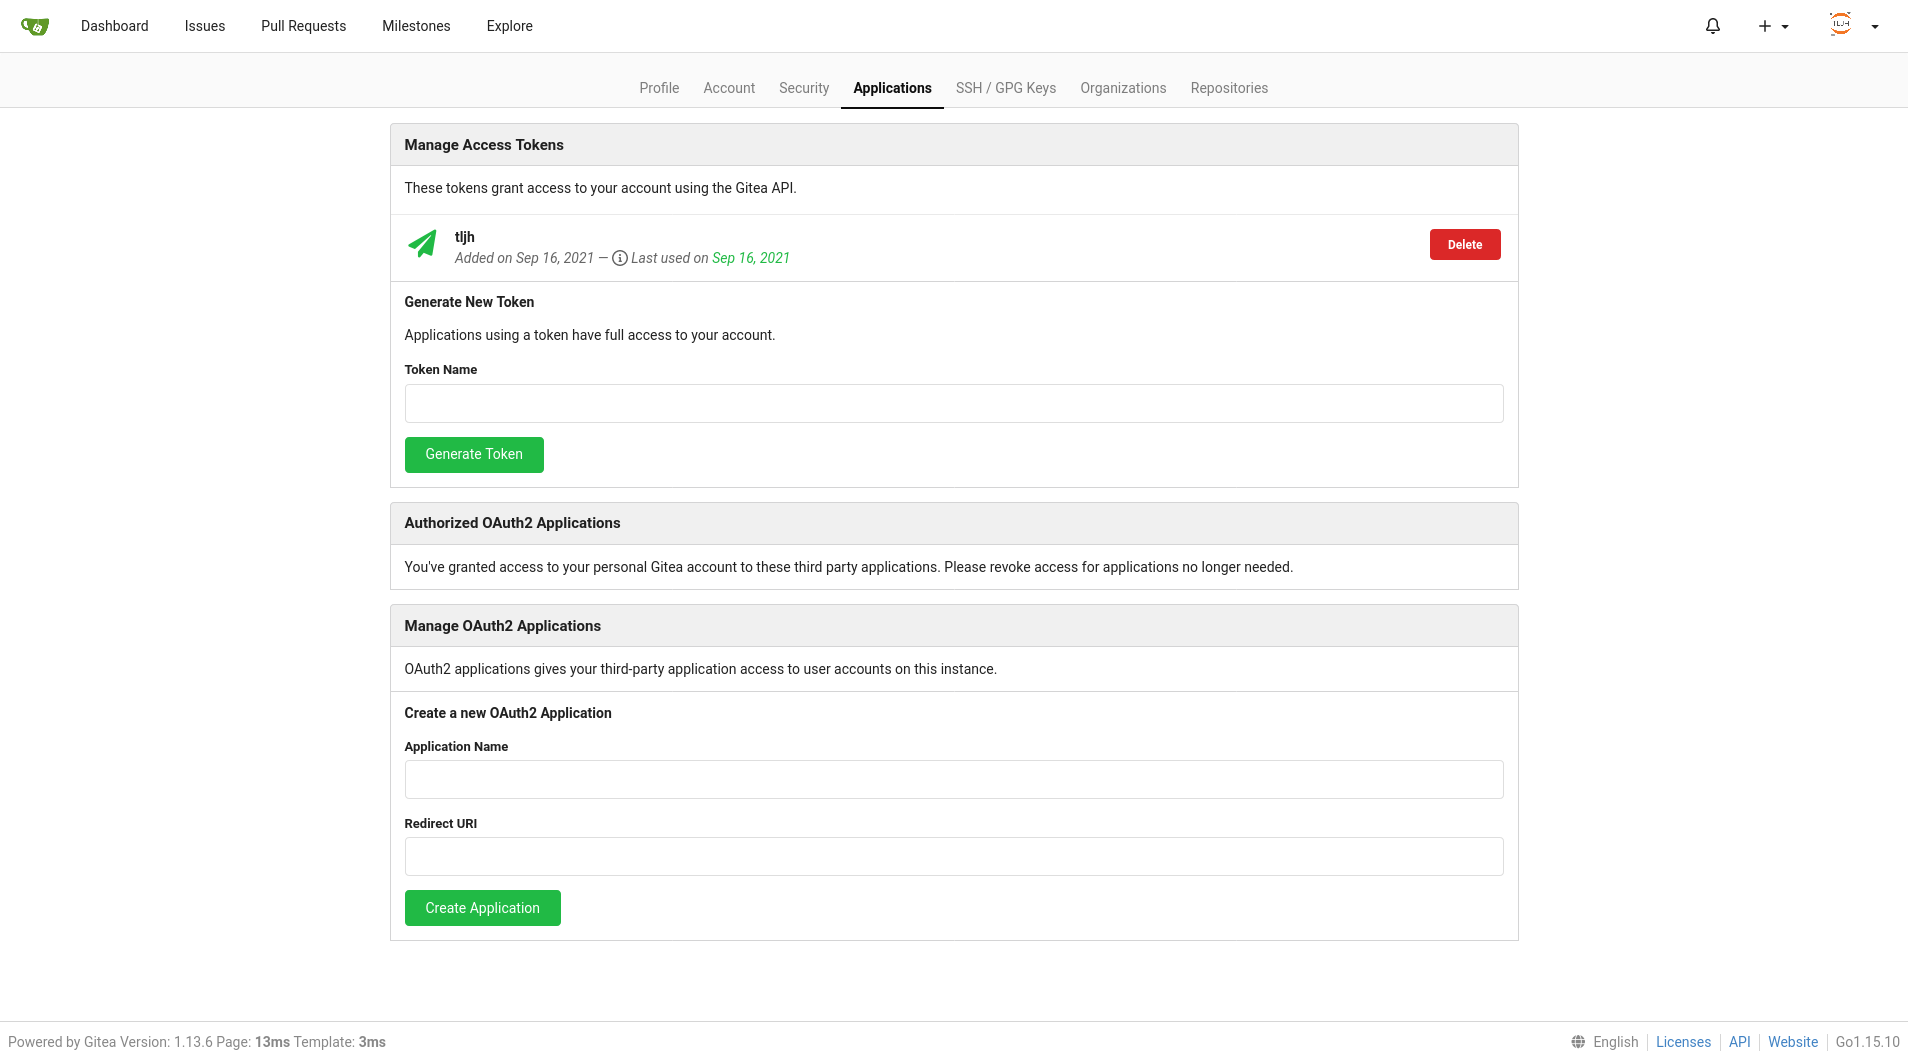
An alternate way to grant/get access is by means of tokens that can be generated using the gitea webinterface. We'll employ this method below.
using git with TLJH
We'll be using nbgitpuller to get the jupyter notebooks from the git repository. First nbgitpuller needs to be installed. This can be acompllished by logingin as user ganymede (the admin user) and execute from a terminal (bash shell):
sudo -E conda install nbgitpuller
nbgitpuller is a jupyter-hub (and also TLJH) plugin which shields the user from the complexities of git and makes it easy to obtain code from the git repository. It works by supplying the user with a URL which contains all the information needed. This URL can be crafted by hand or by using a generator like this one. (see also this documentation).

Using nbgitpuller has this desireable behaviour and properly handles the following merge cases:
| Case 1: | The instructor changed a file that the student has not changed |
| Case 2: | Student & instructor changed different lines in same file |
| Case 3: | Student & instructor change same lines in same file |
| Case 4: | Student deletes file locally, but instructor doesn’t |
| Case 5: | Student creates file manually, but instructor adds file with same name |
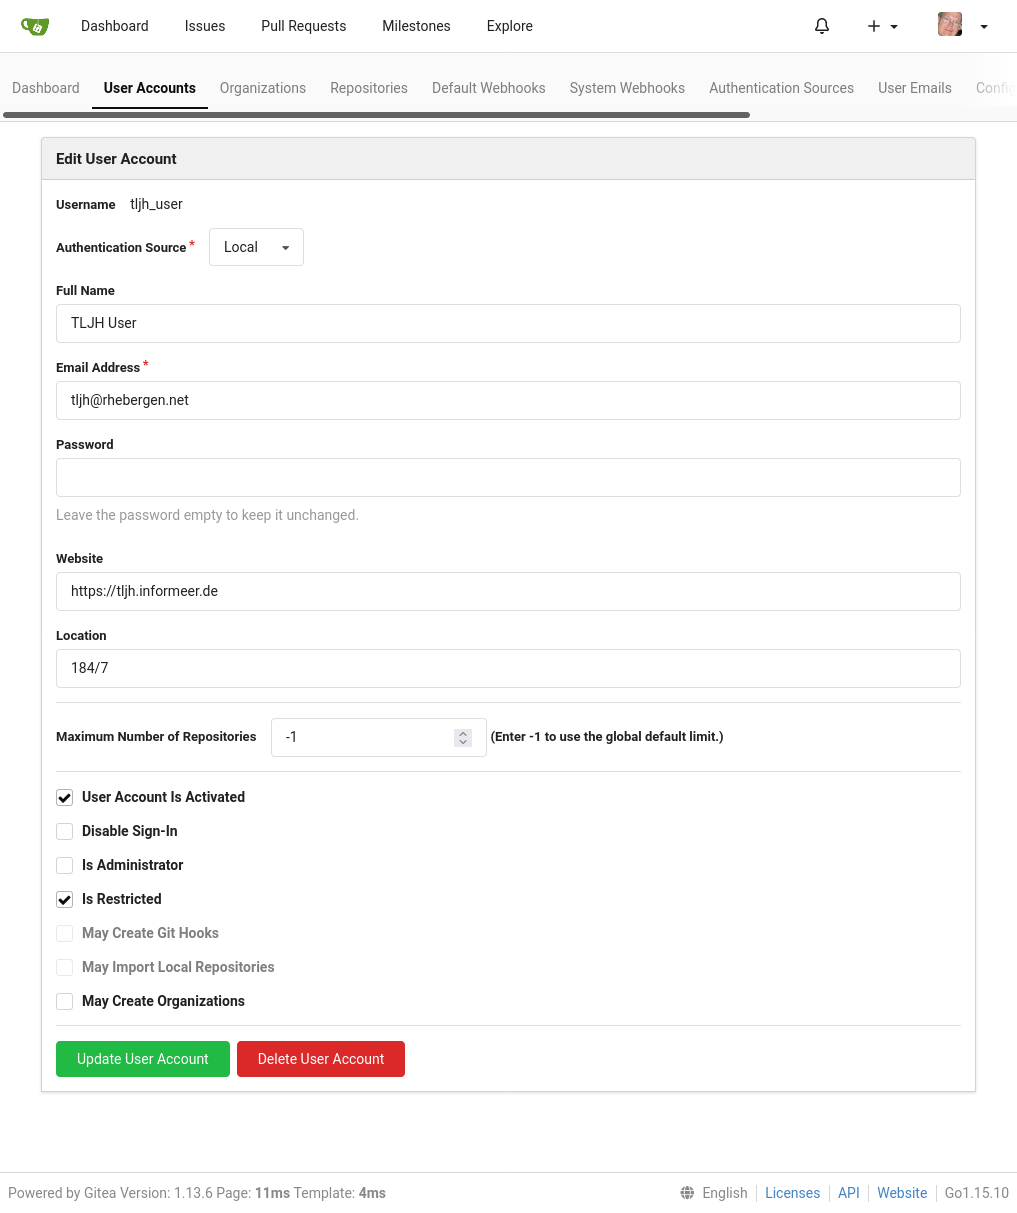
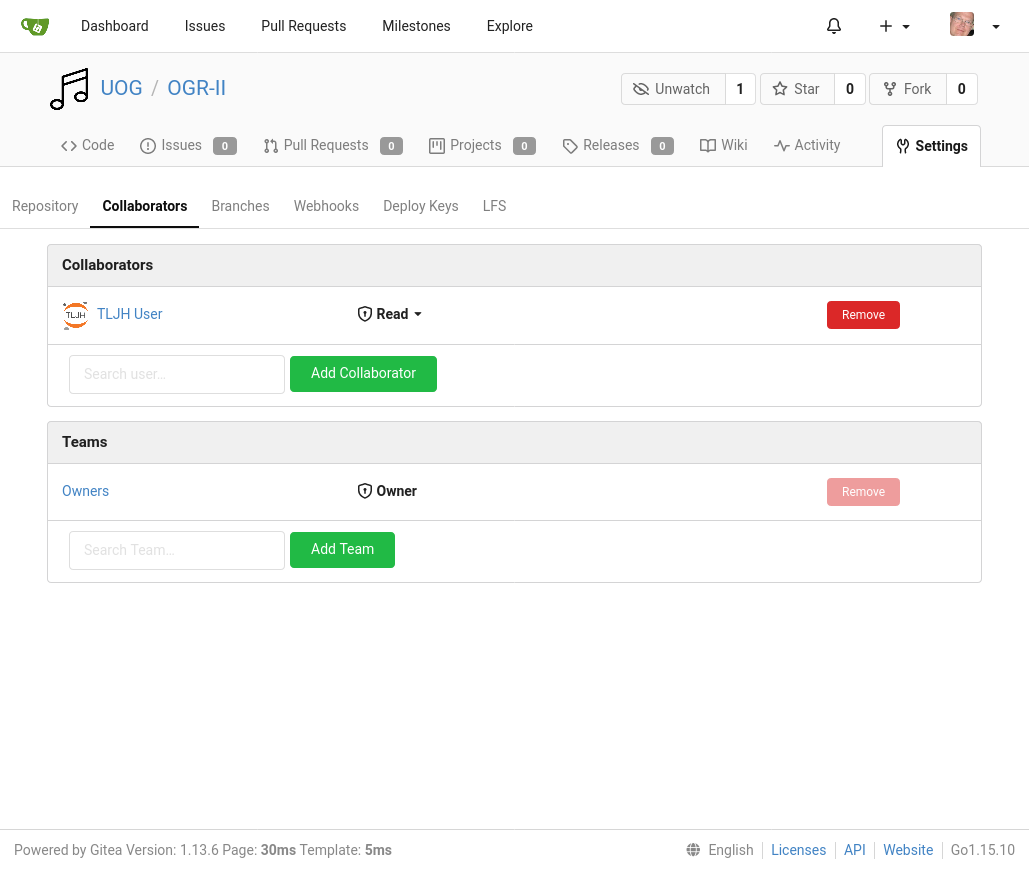
gitea preparations
For this to work we need to make some preparations. These consist of:
- .
All these actions take place using the gitea webinterface (mostly as admin). NB: the token generated allows one to login using the API and without the need for a password. This token is generated ad displayed only once and is not stored by the system itself (on purpose). This means you should save it yourself. When executing the above set the rights/permissions appropriately (minimised).